by Veera Reddy Ramidi
This blog introduces and explains the detailed step by step process for executing the Data Load to Business Analytics Warehouse. Here, we are illustrating for the Student information Analytics data using the new OBIA 11g which is supported only for PeopleSoft 9.0 Campus Solutions.
This blog can be used similarly for any other Analytics using OBIA 11g and continues from my previous post, (OBIA 11g Domain Load to Business Analytics Warehouse).
- Go to the BI Apps Configuration Manager URL and use the BI Apps Administration Credentials to login, making sure that the managed servers (odi_server1 and bi_server1) are up and running.
- In the Navigation Panel (on left), click on "Perform Functional Configurations" under "Functional Configurations." It will navigate to new window.

- Login to the "Functional Setup Manager" using BI Apps Administrator credentials.
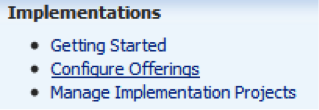
- In the Navigation Panel (on left), click on "Configure Offerings" under "Implementations."

- Expand All Offerings under Oracle Student Information Analytics. And check


- Click

- In the Navigation Panel (on left), click on "Manage Implementation Projects" under "Implementations."

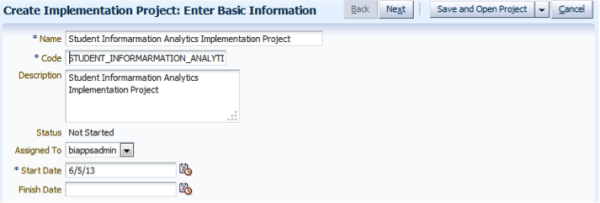
- Create
 New Implementation Project for Student Information Analytics.

- Click "Next."

- Expand all Oracle Student Information Analytics and Include all the Offerings to Implement and click on "Save and Open Project."
- Then click on "Done."
- Go back to the BIACM Page and on the Navigation Panel (on left), click on "Manage Data Load Parameters" under "Data Load Parameters Administration."

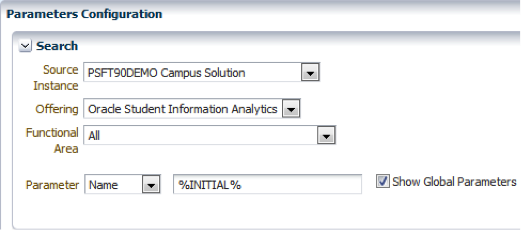
- Search for the INITIAL EXTRACT DATE.

- Click on the corresponding "Global Parameter Value" and change it to 1/1/2000.

- Change the date and click on "Save and Close."
- Go back to the BI Apps Configuration Manager URL and use the BI Apps Administration Credentials to login, making sure that the managed servers (odi_server1 and bi_server1) are up and running.
- In the Navigation Panel (on left), Select "Manage Load Plans" under "Load Plans Administrator."

- In the Load Plans toolbar, click the "Add"
 icon. Enter "Name" and "Description."

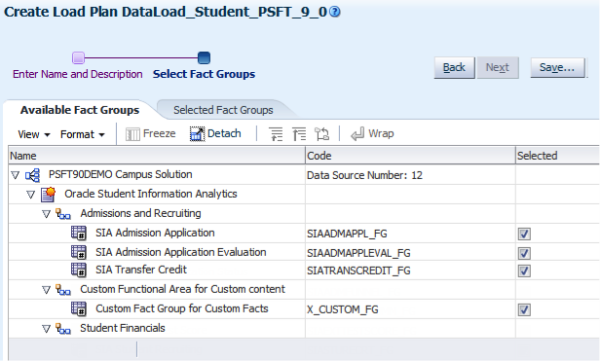
- Click "Next," to select the "Fact Groups."

- Click the "Save" button and select "Save and Generate Load Plan."

- See the status of your Load Plan.

- Once Load Plan is generated, we need to execute it.


- See in the Status that it is "Running."

Congraulations! Data Load Execution is initiated!
 |
Veera Reddy Ramidi is a Senior Business Intelligence Consultant at KPI Partners and works with the expert team within the KPI Partners Offshore Technology Center. His areas of professional focus include OBIEE, Oracle Business Intelligence Applications, Informatica, and DAC. He has received praise for his functional knowledge in healthcare industries. Check out Veera's blog at KPIPartners.com. |


